

Key takeaways
- Wall-mounted: Usually the simplest and least expensive option. It suits a flat, unobstructed wall and makes the screen easier to inspect or remove.
- Ceiling-mounted: Useful when wall space is occupied, but it requires reliable anchors and careful alignment with the projector.
- In-ceiling recessed: Gives the cleanest appearance, but installation is more involved. You need enough ceiling depth, electrical access, and a service path for future repairs.
- Drop-down with adjustable brackets: Helpful when the screen must hang in front of a television, cabinet, or artwork. Verify the maximum drop before ordering.
- Fixed-frame alternative: It is not motorized, but it generally provides a flatter surface for the money. If the screen will remain visible, a fixed frame may deliver a better image than a budget roll-up model.
The best motorized projector screens for most home theaters are 100–120-inch, 16:9 screens with a matte-white 1.0-gain surface, a quiet tubular motor, and either ceiling or wall mounting; choose a higher-gain or ambient-light-rejecting surface only when room lighting cannot be controlled.
Our top picks
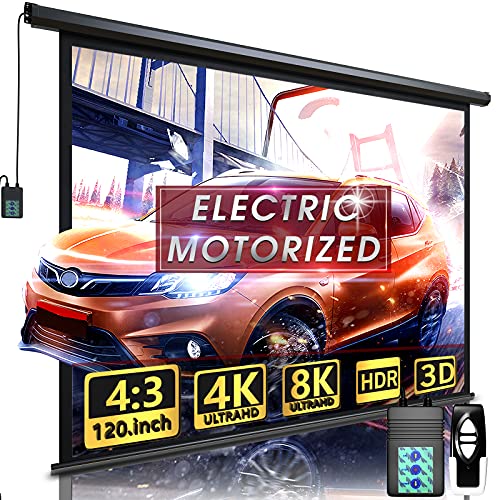


As an Amazon Associate we earn from qualifying purchases at no extra cost to you. Ratings are shown as listed on Amazon.
Quick picks by room and viewing situation
| Situation | Best screen direction | Why it fits | Typical market range in 2026 |
|---|---|---|---|
| Dark dedicated theater | 100–120 in, 16:9, matte white, 0.9–1.1 gain | Natural color, wide viewing angle, forgiving projector placement | $250–$900 |
| Living room with lamps or windows | 100–120 in, 16:9, ALR or CLR surface | Rejects some off-axis or ceiling light, improving contrast | $600–$3,000+ |
| Occasional movie nights | 92–106 in, plug-in wall or ceiling screen | Lower cost, simpler installation, less visual impact when retracted | $180–$600 |
| Large media room or gaming setup | 120–135 in, 16:9, low- or medium-gain white surface | Immersive image without the narrow viewing cone of high-gain material | $500–$1,500 |
| Wide-screen cinema projector | 110–135 in, 2.35:1 or 2.40:1 | Preserves a cinematic shape without constantly changing the screen frame | $700–$3,000+ |
What to compare before buying
1. Screen size and viewing distance
A larger screen is not automatically better. The image must be bright enough to fill it, and viewers should not sit so close that they notice pixel structure or the screen texture. For a 16:9 screen, the visible image width is approximately 0.872 times its diagonal. That makes a 120-inch screen about 105 inches wide and 59 inches tall.
A practical starting point is a seating distance of about 1.2 to 1.6 times the screen width. For the 120-inch example, that is roughly 10.5 to 14 feet. If the front row is closer, choose a smaller screen or a projector with a particularly smooth, high-resolution image.
Leave room for the case above or in front of the screen. A listed “120-inch screen” describes the image diagonal, not the complete housing. The roll-up case may add several inches to the width and approximately 4–6 inches to the height, depending on the design.
2. Aspect ratio
For streaming, television, sports, and most console games, 16:9 is the safest choice. A 16:9 screen uses the available surface efficiently for 1.78:1 content and avoids excessive unused space.
Choose 2.35:1 or 2.40:1 only if most of your viewing is widescreen films and your projector supports lens memory, zoom adjustments, or an external anamorphic setup. On a wide cinema screen, 16:9 programs will either appear smaller or leave unused space at the sides. A 4:3 screen is mainly sensible for older presentations, classic television, or a projector used for business slides.
3. Mounting style
- Wall-mounted: Usually the simplest and least expensive option. It suits a flat, unobstructed wall and makes the screen easier to inspect or remove.
- Ceiling-mounted: Useful when wall space is occupied, but it requires reliable anchors and careful alignment with the projector.
- In-ceiling recessed: Gives the cleanest appearance, but installation is more involved. You need enough ceiling depth, electrical access, and a service path for future repairs.
- Drop-down with adjustable brackets: Helpful when the screen must hang in front of a television, cabinet, or artwork. Verify the maximum drop before ordering.
- Fixed-frame alternative: It is not motorized, but it generally provides a flatter surface for the money. If the screen will remain visible, a fixed frame may deliver a better image than a budget roll-up model.
4. Motor operation and controls
Most home screens use a tubular motor to lower and raise the fabric. Look for a wired wall switch, radio-frequency remote, or both. Radio-frequency control is more convenient than infrared because it does not require line of sight, while a wired control remains useful if a remote is lost or its batteries fail.
Some higher-end systems accept 12-volt projector triggers, dry-contact automation, or smart-home commands. These features are valuable when the screen, projector, receiver, and lights should start together. They are less important for a screen used twice a month.
Motor noise varies by construction and installation. A rigidly mounted, well-aligned screen can sound quieter than the same motor installed against a resonant wall. Avoid repeatedly stopping the screen halfway unless the manufacturer specifically allows intermediate positions; the limit switches are normally set for the fully open and closed positions.
Head-to-head: common motorized screen types
| Screen type | Typical sizes | Surface choices | Light requirement | Main trade-off |
|---|---|---|---|---|
| Budget electric drop-down | 84–120 in | Matte white, usually about 1.0 gain | Best in a dark or dim room | More visible waviness and basic controls |
| Mid-range tab-tensioned | 100–150 in | White, gray, and selected ALR materials | Dark to moderately lit rooms, depending on material | Higher cost, but a flatter image |
| Recessed in-ceiling | 92–150 in | White, gray, ALR, and acoustic options | Depends on the selected surface | Clean appearance and difficult installation |
| Short-throw/ultra-short-throw screen | 100–120 in commonly | CLR or dedicated UST material | Designed to reject overhead light | Must match the projector’s throw geometry |
Tab tensioning is one of the most important upgrades. Side tabs pull the fabric flat as it descends, reducing waves that can be distracting during camera pans. Standard drop-down screens are cheaper, but the fabric can develop curl or horizontal waves over time, especially in rooms with changing temperature and humidity.
Established manufacturers such as Elite Screens, Da-Lite, Stewart Filmscreen, Screen Innovations, and Seymour Screen Excellence offer motorized products across different price levels. Product families and available surfaces change, so compare the exact material, case dimensions, control method, and warranty rather than relying on the brand name alone.
Matching the surface to room light
A matte-white surface is the safest general-purpose choice. It spreads light broadly, preserves color reasonably well, and works with viewers sitting across a sofa. It performs best when curtains, blinds, or dimmable lights can control the room.
Gray material can deepen perceived black levels in a room with some residual light, but it also reduces brightness. A higher-gain white surface can produce a brighter image from the center seats, though it may create a narrower viewing angle, hotspotting, or uneven brightness.
Ambient-light-rejecting surfaces are more specialized. Ceiling-light-rejecting material is designed for ultra-short-throw projectors, while other ALR materials are designed for standard-throw projectors and reject light arriving from particular angles. They are not interchangeable. A screen that rejects ceiling light may perform poorly with a conventional projector mounted behind the seating area.
As a rough sizing calculation, suppose a projector produces 2,400 ANSI lumens and you choose a 120-inch, 16:9 screen. The image area is about 43 square feet, so the theoretical brightness is approximately 56 foot-lamberts before accounting for zoom, calibration, lamp or laser aging, and surface gain. That is ample for many dark-room setups, but a large ALR surface, Eco mode, or substantial ambient light can reduce the practical margin. Use the projector manufacturer’s throw and brightness guidance rather than treating the lumen calculation as a guarantee.
Decision matrix for choosing quickly
| Your priority | Recommended choice | Avoid |
|---|---|---|
| Lowest reasonable cost | 92–106 in standard drop-down, matte white | Paying for ALR when the room can be darkened |
| Best image uniformity | Tab-tensioned screen with a 1.0-gain surface | Very large non-tensioned fabric |
| Cleanest room appearance | Recessed in-ceiling screen with a wired backup control | Installation without access for servicing |
| Frequent daily use | Commercial-grade motor, replaceable control parts, generous warranty | A screen with no published duty-cycle or service information |
| Ultra-short-throw projector | Dedicated motorized CLR/UST screen | Ordinary matte-white material mounted near the floor |
Installation and ownership details that matter
Before drilling, mark the projector’s lens center, the screen’s center, and the required image height. Check that the case is level; a small tilt can make the projected image appear trapezoidal or force excessive digital correction. Use studs or appropriate structural anchors rather than relying on drywall alone.
Leave the screen fully lowered for several hours after initial installation. This allows the fabric to settle and makes waves easier to identify before final adjustments. Keep the lower bar clear of furniture, children, and pets while operating it. An obstruction can strain the motor or damage the fabric.
Dust is usually the first maintenance issue. Use a clean, dry microfiber cloth or the cleaning method specified for the material. Do not scrub, spray household cleaner directly onto the surface, fold the fabric, or roll it while wet. Fingerprints and grease are particularly difficult to remove from ALR coatings.
The parts most likely to wear are the motor, limit switches, remote batteries, control receiver, and fabric edges. A motorized screen is not maintenance-free: a cheaper screen may still be a good purchase for occasional use, but frequent daily operation favors accessible replacement parts and a longer warranty. If the screen develops new waves, first check that the case is level and the side tensioners are not obstructed; do not pull the fabric by hand.
Bottom line
For a dark multipurpose room, buy a 100–120-inch 16:9 motorized screen with a matte-white surface and tab tensioning if the budget allows. For a bright living room, prioritize the correct ALR or CLR material over extra diagonal inches. For a concealed installation, measure the case, ceiling cavity, drop length, and service access before ordering. The best motorized projector screens are not simply the biggest or most expensive models—they are the ones whose size, surface, motor controls, and mounting method match the projector and the room you actually have.
Write Your Review
No reviews yet. Be the first to share your experience!