

Key takeaways
- Wood studs: Usually the most straightforward option. Fasten the mount into the center of at least two studs using the supplied lag bolts and the specified pilot-hole size.
- Concrete or masonry: Requires the correct masonry bit and anchors rated for the load. Do not substitute ordinary plastic drywall plugs.
- Brick: Avoid drilling into weak mortar when possible. The brick type and condition determine the appropriate anchor.
- Drywall without studs: A heavy TV or extending arm should not normally rely on drywall anchors alone. Use a reinforced mounting surface, a suitable mounting board secured to studs, or professional installation.
Best TV Wall Mounts for Secure, Flexible Viewing
The best TV wall mounts are chosen by matching the mount’s weight rating, VESA pattern, movement range, and wall type to your television and room—not simply by buying the mount with the highest advertised capacity.
Quick picks by viewing situation
| Situation | Best mount type | Useful target specifications | Why it fits |
|---|---|---|---|
| Bedroom or narrow room | Low-profile tilting mount | Up to 2.5 in. from wall; 10–15° downward tilt | Keeps the screen close while correcting a high mounting position |
| Living room with one main sofa | Fixed or small-tilt mount | 1.1–2.5 in. depth; 0–10° tilt | Offers a clean installation with little hardware to wear or adjust |
| Open-plan room or several seating areas | Full-motion articulating mount | 16–24 in. extension; 90° or more of swivel | Lets you aim the screen toward different seats |
| Corner installation | Long-arm full-motion mount | 20–30 in. extension; dual-arm construction preferred | Provides clearance to pull the TV away from the corner and rotate it |
| Large, heavy TV | Heavy-duty tilting or articulating mount | At least 25% more capacity than the TV’s weight | Creates a useful safety margin for hardware and installation variables |
Which mount type should you choose?
Fixed mounts: best for a simple, stable installation
A fixed mount holds the TV parallel to the wall with little or no viewing adjustment. It is usually the least expensive option and has the smallest wall-to-screen gap, often about 1 to 2 inches. Choose it when the seating is directly opposite the television and the screen can be installed at the correct height.
Our top picks


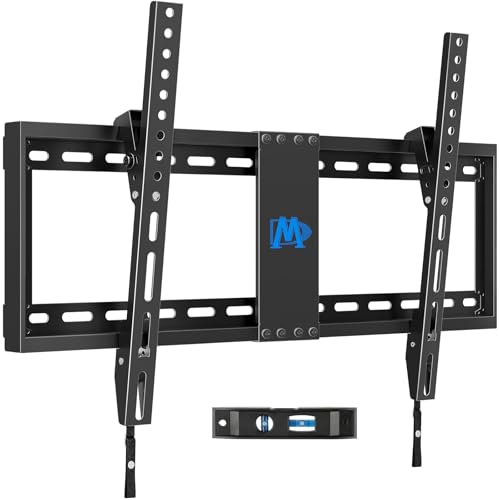
As an Amazon Associate we earn from qualifying purchases at no extra cost to you. Ratings are shown as listed on Amazon.
Fixed mounts are also a sensible choice for larger televisions because they have fewer moving parts. The trade-off is access: unplugging cables or reaching a streaming device can require lifting the TV off its brackets. Check whether the mount includes locking clips or pull cords that can be released from below.
Tilting mounts: useful for high installations
A tilting mount is generally the best choice when the TV must sit above a fireplace, high on a bedroom wall, or above furniture. A downward tilt of around 10 to 15 degrees can reduce reflections and make a high screen more comfortable to view. It cannot, however, correct a television mounted excessively above eye level.
Look for tool-free tilt adjustment, a locking mechanism, and enough clearance to connect cables. Some slim tilting models leave very little space behind the screen, so connect difficult HDMI, optical, or antenna cables before securing the TV.
Full-motion mounts: best for flexible viewing
Full-motion mounts use one or two articulated arms to pull the TV forward, swivel it, and tilt it. They are the strongest option for corner walls, open-plan spaces, and rooms where viewers sit at an angle. A dual-arm design usually distributes load more evenly than a single narrow arm, particularly with larger screens.
Extension range matters more than the headline swivel number. A mount that rotates 90 degrees but extends only 12 inches may not clear a corner or let a large TV face a side sofa. Measure from the mounting wall to the nearest obstruction, then choose an arm that extends at least 2 to 4 inches beyond that distance.
Articulating mounts also place greater leverage on the wall. A 70-inch television weighing 75 pounds can exert substantially more force when pulled forward than when it rests close to the wall. Follow the manufacturer’s stud-spacing and weight requirements carefully rather than relying only on the mount’s maximum rating.
Fit checks that prevent expensive mistakes
1. Confirm the VESA pattern
VESA describes the horizontal and vertical spacing between the threaded mounting holes on the back of the TV, measured in millimeters. Common patterns include 200 × 200, 300 × 300, 400 × 400, and 600 × 400. A television can fit the mount’s screen-size range and still be incompatible if its VESA pattern is not supported.
Measure between the centers of the holes, not the outside edges. The TV manual or specification label is the safest source, especially when the holes are partly hidden by a removable panel. Universal brackets may support several patterns, but their rails must not cover ports, ventilation openings, or the power connection.
2. Compare weight, not just screen size
Screen-size labels are only a rough guide. Two 65-inch televisions can have very different weights, and a soundbar or accessory shelf may add to the load. Select a mount whose stated capacity exceeds the complete mounted weight. A practical target is at least 25% extra capacity: a 60-pound television calls for a mount rated for 75 pounds or more.
3. Check the wall material
- Wood studs: Usually the most straightforward option. Fasten the mount into the center of at least two studs using the supplied lag bolts and the specified pilot-hole size.
- Concrete or masonry: Requires the correct masonry bit and anchors rated for the load. Do not substitute ordinary plastic drywall plugs.
- Brick: Avoid drilling into weak mortar when possible. The brick type and condition determine the appropriate anchor.
- Drywall without studs: A heavy TV or extending arm should not normally rely on drywall anchors alone. Use a reinforced mounting surface, a suitable mounting board secured to studs, or professional installation.
Before drilling, use a stud finder and confirm the result with a small probe hole or the room’s outlet and trim locations. Also check for electrical cables and plumbing. A mount attached to one stud may appear secure but can twist under an extended, off-center load.
How much extension and tilt do you actually need?
Estimate the required extension with a simple measurement. Suppose the TV will be installed on a corner wall, the screen is 18 inches wide from its centerline to the nearest side obstruction, and you want it rotated 45 degrees. A mount extending only 12 inches is unlikely to provide enough clearance. A model with roughly 20 to 24 inches of extension gives the screen more room to clear the corner, though the exact requirement depends on the TV’s depth and width.
For a flat wall with a centered sofa, zero extension is usually preferable. Keeping the TV close reduces leverage and cable strain. For side seating, prioritize swivel range and a smooth arm rather than choosing the longest possible extension. Excessive extension increases the load on the fasteners and makes small installation errors more noticeable.
Brands and mount types worth comparing
Sanus, Peerless-AV, Vogel’s, Mounting Dream, and Echogear are established names commonly associated with fixed, tilting, and full-motion TV mounting hardware. Their ranges differ, so compare the specifications of the individual model rather than assuming every mount from one brand has the same capacity or VESA coverage.
For a premium-looking low-profile installation, compare slim fixed or tilting designs with vertical adjustment and cable-management features. For a budget-conscious installation, a basic fixed or tilt mount can be adequate when the wall is flat, the seating is centered, and the TV is not unusually heavy. Spend more on a full-motion mount when the room layout truly requires extension and swivel; those moving parts are difficult to replace with positioning tricks after installation.
Installation details that affect long-term safety
- Measure viewing height and position first. Temporarily mark the TV’s edges with painter’s tape. Include furniture, soundbars, outlets, and the mount’s vertical adjustment range.
- Locate the mounting structure. Mark stud centers or plan the correct masonry anchors. Level the wall plate before tightening any fastener fully.
- Use every required fastener. Do not omit bolts because one hole is inconvenient. Washers should sit flat, and bolts must be tight without stripping the wall or hardware.
- Attach the brackets evenly. Use the correct spacers when the TV back is curved or the mounting holes are recessed. Uneven spacers can stress the chassis.
- Connect cables before final positioning. Leave a gentle service loop. Tight bends behind a moving TV can damage HDMI or power connectors.
- Test movement gradually. With help, pull the TV forward a few inches, check for wall movement and cable tension, then swivel it through its intended range.
Ownership realities and common mistakes
The parts most likely to need attention are arm joints, tilt knobs, locking clips, and cable ties. Periodically check that the wall plate remains tight and that an articulating arm has not developed noticeable sag. Do not lubricate a joint unless the manufacturer specifies an approved product; grease can attract dust or weaken some plastic components.
Dust the mount with a dry or lightly damp cloth and avoid spraying cleaner into hinges. Recheck the installation after moving the TV, after an impact, or whenever the screen no longer sits level. Common mistakes include anchoring into drywall alone, exceeding the VESA pattern, installing the TV over a heat source without checking temperature limits, and selecting a short arm for a corner location.
Bottom line
Choose a fixed mount for the cleanest centered setup, a tilting mount for a high screen, and a full-motion model when the room demands swivel or extension. Then verify four things before purchase: the exact VESA pattern, the complete TV weight, the wall’s structure, and the extension needed to clear nearby furniture or corners. Those checks matter more than screen-size compatibility alone and are the best way to achieve secure, flexible viewing.

Write Your Review
No reviews yet. Be the first to share your experience!